
These days we shoot African Safari’s with cameras rather than guns but you still need the right kit to capture the wildlife on show so you return home with camera cards full of action and adventure.

In late 2011 I was invited to go on a photography tour of South Africa’s Eastern Cape by South Africa Tourism.
An African wilderness safari must be on the bucket-list for most photographers, especially those who own digital SLR cameras but it can be tricky to choose the camera gear best suited to the type of national park and/or private game reserve you intend to visit. A big zoom lens for shy animals? Or a more portable midrange lens? What if you can only afford a compact camera?
To answer these questions I ventured forth on a 17-hour flight from Sydney to Johannesburg, followed by a connecting flight to South Africa’s Eastern Cape province. Indeed it was a wonder I made it through the boarding process without my bulging backpack filled with cameras catching the eye of Qantas staff as I got onboard.

I write short articles as well as long feature “explainer” articles on topics including: Google Android Smartphones and Tablets, National Broadband Network (NBN), Space, Civil & Military Aviation, Ebooks and the Publishing Industry, Electric cars, Technology augmenting human capabilities etc for Geare Magazine. The editor of GEARE has kindly permitted me to post articles here after the magazine issue the article was printed in has passed its shelf life. I have edited and added updates where necessary.
Dreaded Dust
Whether you’re planning to visit a national park or game reserve, one thing is guaranteed – dust. Dust is public enemy number one for any photographer, because if it gets inside a lens or camera body it can wreck the electronics and imaging sensor.
Yet on a safari you’ll be wanting to take both wide-angle landscape photos and zoomed-in shots. So there a few possible options.
The most obvious is simply to take a digital SLR camera with you, have the zoom lens on it most of the time and switch to a much shorter lens such as a 15-85mm (Canon) or 16-85mm (Nikon) as required.
This leaves you open to the full risks of dust – and there won’t be any camera repair shops nearby to fix things. Having just the one camera also means possibly missing a photo opportunity entirely as you switch from zoom to wide, or vice versa.

So you could perhaps take two digital SLRs. If you’ve seen photo-journalists or event photographers at work, you may have noticed how they often have one D-SLR hanging from ach shoulder, each with a different kind of lens. This solves the dust and speed problems — you won’t need to remove the lens from either camera but obviously it is twice as expensive in terms of camera bodies and also it takes some practise — I can attest firsthand that it can get pretty cumbersome handling twin D-SLRs in a cramped jeep with other people jostling for a view.
The third solution is my favourite. Take one D-SLR, plus a good compact camera, the kind often identified by the rather ugly term ‘pro-sumer’. With the best of today’s digital compacts achieving great results for wide-angle and macro photos, you can keep a zoom lens on your D-SLR and just pocket the compact when not required. This is a good balance in terms of budget and practicality, while keeping the dust factor to low risk.
Essential Accessories
You know those camera bags with endless little compartments for accessories? They don’t make ’em for the fun of it; accessorising is essential.
I find it amazing that people take the trip of a lifetime and suffer for the lack of a basic accessory. So here’s my must-have list
Lens caps – Protect the glass at both ends of all your SLR lenses from dust and damage. When you remove the back cap (at the connecting end), mate it with the body cap which protects the camera body when no lens is attached, and put both straight back where you keep the lens, so you can refit them as soon as you remove the lens again (or transfer the body cap to the back cap of your next lens). Have a standard place like a buttoned top pocket where you keep the front cover for the lens currently in use.
Ultra-thin UV lens – for more expensive SLR lenses. It’s much cheaper to replace a UV filter than to fix an SLR lens that has been scratched, chipped or dropped. A high-quality UV lens will not appreciably affect image quality.
Micro-fibre cloth – All lenses need to be cleaned if they get wet or covered in dust. So do camera bodies.
Macbook Air or Windows Ultrabook laptop – Not only handy for viewing the day’s photos on a screen larger than the camera viewfinder (so you can delete the rubbish ones), but essential for making a backup copy of the best ones and possibly zapping them up to cloud storage. Make sure it has a camera card reader slot!

Shotgun microphone – If you’re going to take video with your D-SLR (presumably with a wide angle or mid-range lens), then don’t rely on the probably ho-hum built-in microphone. The Rode Video Mic Pro is one shotgun mic that slots into the hot shoe on top of your SLR and will make a phenomenal difference to the audio quality of your videos.
Backpack and/or camera bag – Backpack choice depends on personal preference; I like the BlackWolf Tomahawk 35L that has served me well during many trips around Australia and Overseas. Lowepro, Tamrac, Tenba and other specialists offer almost bewilderingly large ranges of camera bags packed with pockets, compartments and straps that allow quick-release deployment of all the items within.
Batteries and cards – Always carry at least one spare battery and at least one spare high-capacity camera card. And if it’s the trip of a lifetime, don’t buy a cheap no-brand generic SD card. It may work fine, but it might just corrupt, and once corrupted, it’s near impossible to retrieve your photos.
Consider not only the size of the cards you use, but the speed at which your camera can write to them. I make sure to match whichever best D-SLR I have at the time with an equally good card that allows the camera to take photos quickly, especially in burst mode (with today’s fastest burst cameras, it is often the card that limits the burst speed). Currently I’m using 32GB SanDisk Extreme Pro SDHC UHS-I cards in my SLR’s.
What size of card is best? There are two schools of thought here. You could use a massive card that can store a whole holiday’s worth of photos without being swapped out. But cards can corrupt and cameras are a big target for thieves. With no back-up, you lose everything. Many professional photographers regularly switch out smaller cards or half-empty cards, to secure the photographs already taken.
Then again, I’ve seen people stop taking photos halfway through a trip because they ran out of space and didn’t have a laptop available (or electricity with which to charge) to shift across their photos, wipe the card and start again.
In any case, it makes sense to copy your best photos across to computer each night during the trip and keep them on the card as well — otherwise again, you have no back-up. Given that laptops are just as attractive to thieves as cameras, keep your pictures on both, and put them in separate bags when travelling. And whenever you counter a solid internet connection, it’s worth sending your best shots straight to cloud storage, a double theft-proof back-up!
Digital SLR Lenses
Canon EF 70-300mm f/4-5.6 L IS USM Lens (tested with Canon 60D D-SLR)
This lens was paired with the Canon 60D’s APS-C sensor during my South Africa trip. The L in its name (and the silver-grey metallic body) signifies that this is a professional level lens, and it comes with a commensurate price tag. Quite simply, this is the most fun SLR lens I’ve ever used. Its mere technical specs don’t communicate how easy it is to use, its really fast and quiet focusing, the dust-proof and rain-proof tough metal body and the ability to take sharp photos throughout the 70-300mm range.
Compared with cheaper budget lenses with a similar focal length, it is much faster to focus, it is quieter, has excellent image stabilisation and is equally capable from its widest point at 70mm to its longest at 300mm. It is the perfect companion for a shorterlens like the EFS 17-85mm. While it has the rugged quality of an L lens, it weighs only 1kg and isn’t physically very long so it’s easy to carry and pack while travelling. The fluorine treatment applied by Canon to the lens also makes it easy to clean.
The only caveats are that being F4-5.6, it’s not suitable for very fast moving objects or low light, at least not without a high ISO or off-cameraflash/lighting to compensate. Also consider an inadvertent security issue – the Canon’s desirable white lens body makes it obvious to everyone that you’re using an expensive professional lens!

Sigma 120-400mm F4.5-5.6 DG APO OS HSM lens (tested with Pentax K7 D-SLR)
I used this lens paired with an APS-C sensor Pentax K7 D-SLR, although it is also available in lens-mount versions for all major D-SLRs including Canon, Nikon, Sony, Pentax and Sigma.
Both this Sigma and the Canon lens on work with APS-C and full frame SLRs, with a 1.5 multiple 35mm focal length equivalence for APS-C sensor Pentax/Sony/Nikon and 1.6 multiple for Canon APS-C cameras.
In terms of construction the Sigma 120-400mm is mostly metal, with few plastic parts. This, coupled with a quiet and very smooth and relatively fast motor, gives it a solid reliable feel. All lenses above 300mm focal length are heavy, and this is no exception – hanging its additional 1.75kg around your neck for long periods is out of the question. Focusing for a sharp photo in lower light conditions (dawn and dusk) becomes harder as you push past 250-300mm towards 400mm, where the lens can hunt a bit. I found it faster to pre-focus at around 300mm, extend to 400mm and fine tune. Closing the lens down to around f9 helped to increase sharpness, though it’s worth experimenting; the optimum setting varies depending on light conditions.
The in-lens optical image stabilisation proved of great use when trying to take a steady shot; use setting 1 most of the time and setting 2 when panning. Practice is advised! With this focal length and suitable settings (plus a steady hand/tripod and some skill), it can even be used for great photos of the moon. While not rated as a rugged lens, I used the Pentax/Sigma combo while driving in dust generating jeeps and no dust got inside.
Sigma supplies a padded case for storage during transport and a large lens hood which is handy to keep sun glare out. Zoom creep is an issue if you hang the camera off your neck; it’s best retracted to 120mm with the lock switch engaged when not in use.
Similar focal length lenses are available from the SLR camera heavyweights. Canon has the L-series 100-400 EF and Nikon the Nikkor AF 80-400mm. But with the Sigma lens a little under half their price for far more than 45% of their performance, this is well worth considering if you require zoom greater than 300mm.
Location Location
A final thought which became apparent only after my safari trip. There are different kinds of safari destination, and the places you choose to visit can determine what kind of camera and lenses will be best suited to taking great photos of the wildlife and wilderness areas.
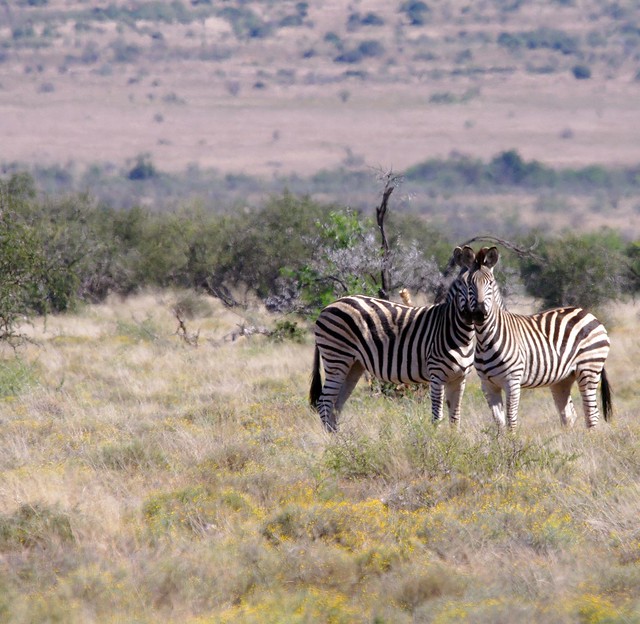
Small Private Game Reserve – If you plan to spend most of your time in a small reserve (like Inkwenkwezi), then a midrange zoom lens such as 70-300mm should be fine. Small game reserves have relatively few guests at any one time, so you don’t compete with dozens of other vehicles to find animals and when you do encounter them, the animals are generally relatively close, not a few kilometres away on the horizon being chased by multiple jeeps.
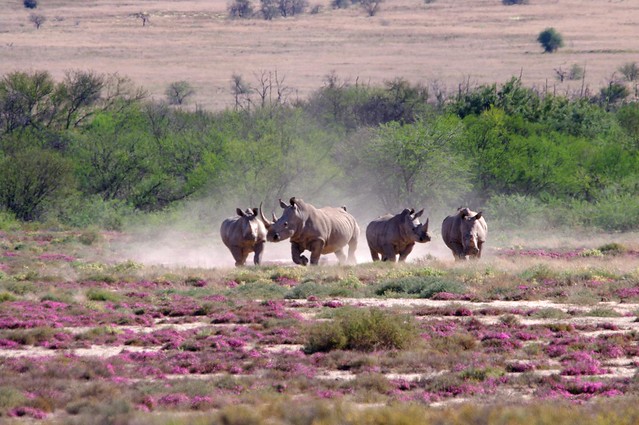
Large Private Game Reserve – A larger game reserve (like Samara) requires a wider variety of lenses, as there is plenty of space – wildlife may dash far away if spooked by your jeep (or noisy fellow passengers). It’s well worth considering taking a longer 300mm+ lens.
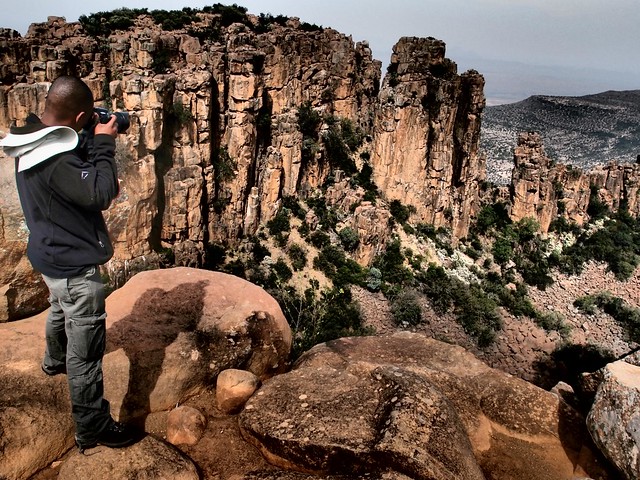
National Parks – The National Parks vary immensely in size. In the massive Kruger and Kgalagadi Transfrontier Parks, a big zoom may be required. In the such smaller areas, as with my visit to Camdeboo National Park, a 70-300mm is perfect for the job.
This article was originally published in GEARE Magazine issue #69. It is “digitally reprinted” here with permission from the editor. I have added updates where new information is relevant.
Leave a Reply